Monday, May 7, 2012
Tutorial/ Crate & Barrel Inspired Painted Pillow
I received a new catalog from Crate & Barrel in the mail, there were so many eye candies in there, but I especially LOVED this pillow...
I decided to make my version of Crate & Barrel’s inspired pillow using what I had. I will show you how I did it.
{You will need}
1------16" x 16" Pillow form
2------18"x 18" Fabrics (I trimmed them down after I painted them. I used linen instead of canvas)
1------14"x 14" zipper
Fabric Paint 1 - 2 bottles
Fabric Medium
Roller
Freezer Paper
Craft Punches
{How to}
* Fabric Paint
1. Lay one 18"x 18" fabric on a flat surface and Find the center. I just used my 10 1/2" dinner plate to draw a circle. Make sure to draw really lightly, because some of the areas I drew on were too dark, and after I painted once it still showed through.
2. I used three different types of flower punches. Cut lots of flower pieces out of freezer paper.
3. Place them in the circle you drew. Press them with a hot iron without steam.
4. Paint the fabric. I used Martha Stewart multi-purpose paint mixed with fabric medium. Paint the other fabric too. Let it dry for 24 to 48 hours. After they are completely dry, iron to set the color.
* Assemble the Pillow
1. Lay both fabrics together right sides together on the cutting mat. Trim off the excess from all sides to make it to 17" x 17" squares. Then treat one side of the edge from both fabrics to prevent fraying.
2. Lay the zipper on one side of the fabric, and mark about 2 1/2" in from both sides. Then sew both ends, do not forget to do backstitch so they don't fall apart later.
3. Then switch your stitch length to your largest setting and sew the part in between the 2 1/2" sewed part (can you see the big stitches and small stitches?)
4. Open the seam, and press with the iron. Lay the zipper front side down. Pin it to the seam.
5. Switch the stitch length back to normal, and also swap to the zipper foot and sew the zipper on.
Front...
Unpick the basting stitches, so you can use the zipper...
6. Open the zipper, and put the fabrics right sides together again. Pin them well.
7. Sew the three sides using 1/2" seam.
8. You can choose your preferred method to finish the edges, but I thought that the fabric was pretty stiff from paint, I decided to try pinking scissors. Cut off the corners for a prettier finish.
9. Turn the pillow case inside out, press the edges with the iron.
Time to enjoy!!
I love love how it turned out, the fabric is a little bit stiffer with paint than I thought it would be, but that's OK. This is meant to be a "decorative" pillow. :) I enjoyed the process so much so that I am thinking about making more.
Saturday, December 17, 2011
Tutorial~ She Carries Flowers (key holder)
I will also list this on my side bar along with my other tutorials.
I have been obsessed with folded fabric flowers and wool flowers lately. I have created a bag and refashioned one of my old cardigans by using the flowers and I LOVE how they turned out.
The love of those flowers didn't end there and I still have a bunch of ideas for them. I am sharing a tutorial for a key holder today and of course it is decorated by fabric folded flower... The key holder is easy to make and you can make a whole bunch of them inexpensively. It is a perfect stocking stuffer, or for a gift exchange with the girlfriends you hang out with.
I hope you will enjoy the tutorial!

{You will need} --- For one key holder

1 --- 2 1/2" x 6 1/2" fabric
1 --- 2 1/2" x 2 1/2" fusible fleece
Matching thread
1 Ring
6 --- 1 1/4" x 1 1/4" fabric squares for making a flower
Buttons and beads to decorate
{How to}
1. Fuse the fusible fleece to the fabric. Follow the instructions that came with the fusible fleece. Fold the fabric at the edge of the fusible fleece. Measure and mark the fleece, according to the picture. If you are making more than one, it will be quicker to make a pattern with a piece of paper and trace it.

2. Sew inside of the line, using 1/4" seam. Cut off the excess and cut small triangles around the corners for a nicer finish.

3. Turn the fabric inside out. It is easier to use scissors or a chopstick to push the fabric out. Fold the top in thirds, and press the whole thing with an iron. Stitch around the edge with 1/8" seam.

4. Fold 1/4" from the top, and put a ring on the fabric and fold the fabric over the ring and sew the ring into the key holder.

5. Sew fabric folded flower, beads, and buttons to the key holder. I did it so that the stitches are not showing on the other side. You can see what I did to make the flower here .

I enjoyed coming up with combinations of fabrics, buttons and beads. It is so funny that a slight change can give each key holder a whole new look.


I hope you have enjoyed my tutorial today. Happy sewing!
Saturday, December 10, 2011
Stocking Pillows–tutorial & a giveaway!
This is a re-post of a tutorial for my Pottery Barn knock-off pillows that appeared on Craft Gossip in November.
****************************************
Pottery Barn has terrific pillows, no doubt about it. However, they also seem to be rather fond of their pillows, based on the price they put on them! For example, their Knit Stocking Lumbar Pillow cover is $49.
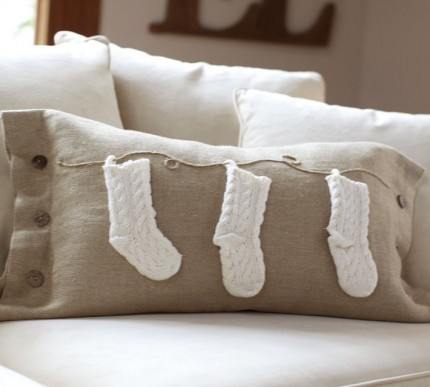
Yep, just the cover—pillow not included!
I actually visited the store (for the second time in my life) to get a closer look at this pillow. It’s SUPER cute, but really there isn’t anything too difficult about the construction or design.
So…I decided to make my own!
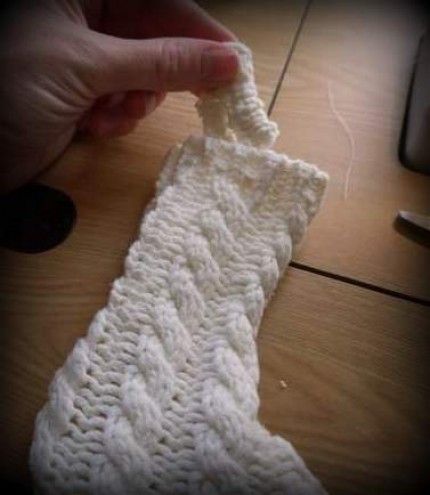
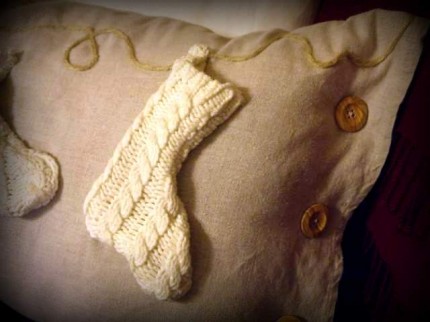
The little knit stockings are (obviously) what make the whole pillow. I visited a couple of local thrift stores and bought sweaters that had small-scale cable patterns.
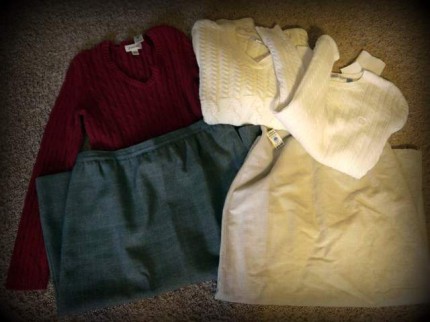
And what else? Skirts! I could have gone to a fabric store and bought off-the-bolt fabric for the pillow slips. But I’m lazy; I was already AT the thrift store!
Pillow inserts came from IKEA. The FJDRAR inserts are 16” x 24” and cost a whopping $3 each.
I drew a stocking shape on a scrap of tissue paper for my pattern. I pinned my pattern so the bottom hem of the sweater would become the top of the stocking—less finishing work that way.
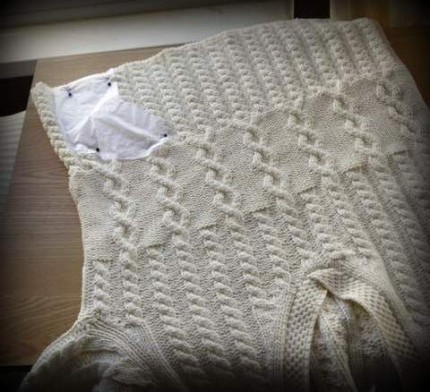
Pin the wrong sides of each stocking together, stitch around the edges (by hand or machine), and voila! Three little knit stockings.
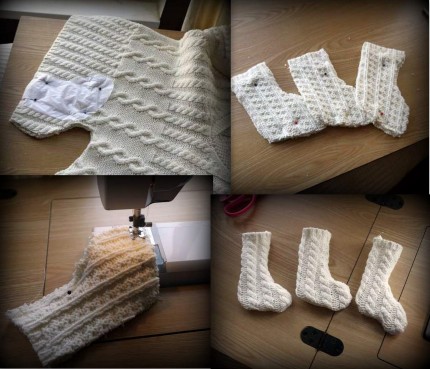
I used another scrap of sweater material to make the stocking hangers, but you could use a loop of ribbon or yarn or twine.
To make the pillow slips, you want to add 1” to the width of your pillow form (1/2” on each side for a seam allowance), but about 4” to the length, to allow for the hem and the buttons. Here’s a tip, though—if you’re using the IKEA pillow forms, they aren’t very “full,” so I actually didn’t add any extra for seam allowances—that allows me to stuff the pillows a little fuller.
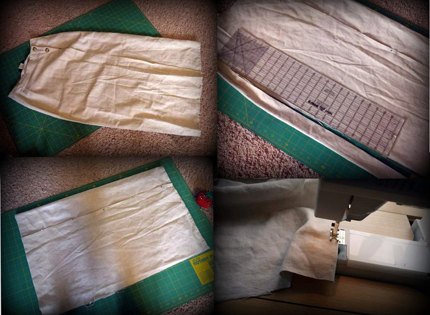
If you are using a skirt like I did, make sure to take advantage of the already-finished hem for one side of your pillow, and you can even use one of the side seams for your top seam. (Don’t forget that you don’t need that 1/2” seam allowance then. Don’t worry if you mess up; pillows are very forgiving.)
It’s easier to stich on your stockings and trim if you leave either the top or bottom seam unfinished. Lay everything out and be generous with your pins! I stitched the trim down first, and then I “tacked” the stockings in place by stitching back-and-forth-and-back-and-forth for about four stitches at about four places around the stocking (right near the edges). This could easily be done by hand as well. And the trim? Well, I gave strong consideration to using hot glue!!
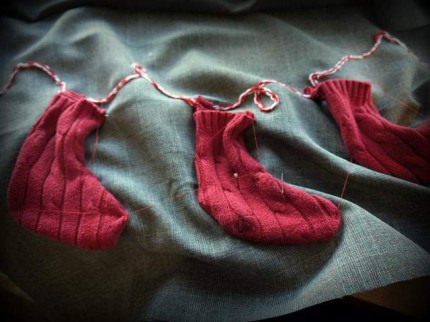
Isn’t it amazing how the colors changed mid-project?? Must be Christmas Magic!
The last step in completing your pillow is to add the buttons on each side. If you want to be able to re-use the pillow insert, you can use real buttonholes, or you can just stitch the buttons on through both layers of the pillow cover! And what you choose to do may depend on what kind of day you’re having… (guess what I did??)
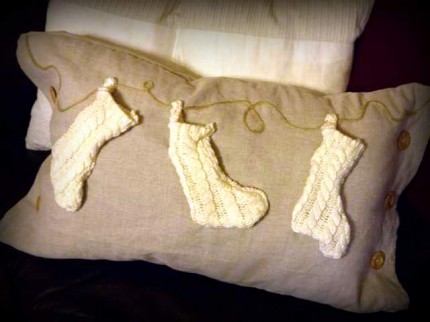
Ta-da! Here’s my Pottery-Barn knock-off.
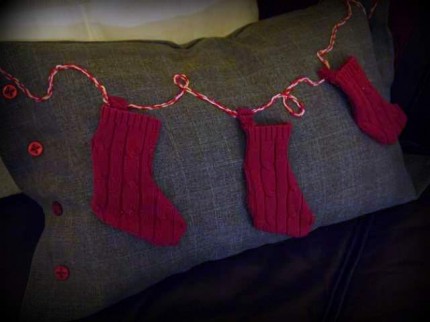
But why stop there? There are a whole lot more options when you’re making them up as you go along! I loved this combination of red with a subtle gray plaid (from another skirt)…
…or you can make it even easier by using a pre-made pillow cover (this red velvet one was $7 from IKEA) and just dress it up with the stockings! (See the candy cane? these are functional, baby!)
And maybe you can add some jingle bells since this one didn’t get buttons!
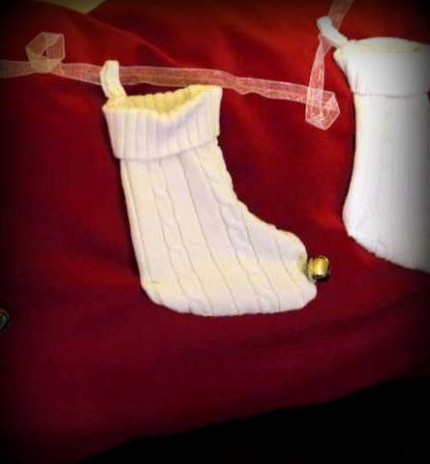
I had fun making the three pillows, but quite honestly, the gray one doesn’t go anywhere in my house! But I thought maybe one of YOU might like it!
If so, simply leave a comment here! Tell me…what one gift would you most like to GIVE this year if you could? Let me know, and you’re entered to win. Giveaway will end Thursday, December 15. Please leave your e-mail if you don’t have one linked up!
*******************************************************
Linking up here:
Friday, November 18, 2011
Transparency Transfers
I’m a lot slower getting this posted than I had intended…sorry about that. But here I am now, with the BIG SECRET TRANSFER METHOD (no, not really) that I promised when I posted about my French Chocolate Bar Stools.
I have had lots of fun transferring vintage French ads (courtesy of the Graphics Fairy) to various pieces of furniture, such as the French Chocolate table, Café table, the Postcard table, the Black Coffee table and French Twist table. I used an overhead projector for all of those, and I really love the look I was able to get.
However….
…I had to choose my graphics very carefully, as I am limited in the amount of detail I can recreate with my paint brush. Plus…I simply don’t have the patience to do anything really teeny tiny, so that’s why I focused on tables!
So I wanted a way to simply transfer images without necessarily having to break out the paint brush. I tried Mod Podge transfers (there’s a good explanation here), but I had mediocre results. I shelled out the money for Citra Solv, and had good results—some of the time (this method is explained here). So I got discouraged.
But…the Citra Solv transfer PLUS the overhead transparency method gave me a new(ish) idea.
When I wanted to use my overhead projector, I had to print my graphic out on paper and take it to a copy store to have the transparency made. Ink jet printers (which is what most homes have) deposit ink on the surface of a sheet, so it will smear off if you touch it. Laser printers/copiers do something like injecting the image into the sheet, so they are permanent. (Yeah, I’m just shooting from the hip for this explanation. Just go with me here.)
Citra Solv transfers work because the Citra Solv re-dissolves the ink on your page, allowing it to re-deposit onto your project. (The issues I had with Citra Solv is that it DID NOT always re-dissolve the ink—maybe some toner cartridges are getting better??)
so one day I had an “aha” moment—if I printed on a transparency sheet using my ink jet printer, the ink was already “dissolved.” So…could I just transfer an image without any special solvents?
Well, let’s see, shall we??
Here’s a Citra Solv transfer onto a painted surface.:
…and an unpainted surface:
Here’s an ink jet transfer onto a painted surface:
…and an unpainted surface:
Pretty hard to tell the difference, huh?
I was majorly excited after this little experiment.
Like my cute little test board??
But then….I got stuck.
See, the real difference is that if you’re transferring from a laser copy, THAT ink is NON-water soluble (thus, you have to use the Citra Solv). If you’re transferring from an ink jet copy, that ink IS water soluble and it will continue to be so. If you wanted to wash your project at some point—the image would come off. If you try to use something like, say, Minwax Polycrylic (which is water-based) to protect your image—you’re going to end up with a big smeary mess which will cause you conclude that your grand idea is a huge failure and you might just hide your project board in the laundry room for the next four months.
Yep. Really.
But then one day (four months later) a new idea might finally occur to you—which you, being MUCH SMARTER than I am—probably already figured out!!
If you do an ink jet transfer, you have to use an oil-based protective coat.
That’s all there is to it. No water = no smeary ink!
For the stools, I used Minwax Hand-rubbed polyurethane, and I didn’t have any smearing problems. Such a simple solution, but seriously—it drove me nuts!!
Now, recently there have been some other projects in blog-land that have transferred ink-jet images using freezer paper. It’s the same principle, so you can use whatever substance you happen to have one hand (I promise I came up with this idea independently of those, and I have the dates on my pictures to prove it! )
The two slight advantages that I see in using transparency sheets are these:
- After you’re done with your transfer, you can wash the ink residue off of the transparency, making it completely reusable.
- Since the sheets are—you know, transparent—you can more accurately place your image on your project.
So here’s a quick run-down of the steps I use for a “transparency transfer,” using a cool old bread board for my project.
1. Slightly dampen your project to facilitate the ink transfer. I generally wiped it with a damp cloth, and then waited a minute or two for it to be nearly dry.
2. Print a reverse image of your graphic (I copied my images into Microsoft Word. Click on the image, and a new tab called “Picture Tools” will appear at the top of the page. Click on the tab and then on the “Rotate” option, and “Flip Horizontal”) directly onto an overhead transparency (you can buy individual sheets from a copy center; no need for a whole box). Tape it in place.
3. Using the back of a spoon (I have also used a bench knife), rub the image ALL OVER and HARD to transfer as much ink as possible.
4. Voila! You have achieved image-transfer-nirvana. If you want to protect your image, let it dry fully and then give it a coat (or two) of a non-water-based polyurethane.
That was a very long-winded explanation, so congratulations if you haven’t completely lost interest yet (image transfer----whaaa?? who cares??)
What do you think? Is this something you might try? Or is it so simple as to be…stupid, and everyone already knew about it but ME??
Note: The super-slick surface of the bar stools did not “take” the transfer quite as well as the softer wood of the cutting board, so I used a black Sharpie to darken up the image in places.
**************************************************************
This project was featured at Craft Gossip and My Uncommon Slice of Suburbia.
****************************************************************
Linking up to these great parties:|
|
|
|
|
|
|
|
|
|
|
|
|
|
|
|
|
|

best blogs


Praca poznań w Zarabiaj.pl


